
The Briggs & Stratton Flyer
The Flyer / Flying / The "Original Briggs Flyer"
Welcome to my photos of my Flyer Project. I spent 6 months building it. We took it out for its maiden voyage on 9/3/09.
Such a project does not come alone, it takes perseverance, patience, guidance and somewhere behind the scenes, someone who knows what they are doing! There are those that I need to thank.
First and foremost, my Wife and Best Friend of ought near 25 years. Were it not for her letting me be me none of this would have happened.
I would like to thank my Brother-in-law Matt for his help building, planning and for getting us into this sport in the first place.
I need to thank Terry Lutke ( http://www.cheaptrikeflyer.com ) for his guidance and advice. Terry designed and built the power plant and re-drive portion of the flyer. His knowledge of these flyers is outstanding and his love of flying and sharing the sport is contagious!
Most of all, I need to thank Skyman Scott Adair, (
skyman@time2fly.
The Motor
I have a lot of history with internal combustion
engines. Been taking them apart since I could hold a wrench. Have built
engines, cars, etc for decades. So as I entered into this project I gave a
lot of consideration to the power plant. I have never been a fan of
two-strokes. I know the power to weight ratio is superior, they work great on my
chain saws, but I feel that 4 strokes are more dependable and much longer
lasting. I was also enamored with the thought of building with an American name
V-Twin. I like to have things a little different and a non two stroke would be
different. Harley motors are great, I own a couple of them, but too much weight and HP for this
application. The next logical option was a Briggs and Stratton. They
are well built, the folks at Briggs have already engineered out all the bugs.
They run for hundreds and hundreds of hours between re-builds. I can get all the
parts I will ever need at my local Tractor Supply Store! All in all no
reason to go anywhere else. Then as I researched the project I stumbled
across Terry Lutke's website. I did some research on the various users
groups I belong to and made contact. Terry had perfected exactly what I
wanted and for the same reasons I wanted it. So in March of his year we
packed up, left NH and made a road trip to Michigan to see him. Terry's
choice from B&S is a 38 cu in, 23 HP V-Twin. It features an external oil cooler,
12 volt system/16 amp alternator w/electric start. Perfect!
are great, I own a couple of them, but too much weight and HP for this
application. The next logical option was a Briggs and Stratton. They
are well built, the folks at Briggs have already engineered out all the bugs.
They run for hundreds and hundreds of hours between re-builds. I can get all the
parts I will ever need at my local Tractor Supply Store! All in all no
reason to go anywhere else. Then as I researched the project I stumbled
across Terry Lutke's website. I did some research on the various users
groups I belong to and made contact. Terry had perfected exactly what I
wanted and for the same reasons I wanted it. So in March of his year we
packed up, left NH and made a road trip to Michigan to see him. Terry's
choice from B&S is a 38 cu in, 23 HP V-Twin. It features an external oil cooler,
12 volt system/16 amp alternator w/electric start. Perfect!
The Build
 The
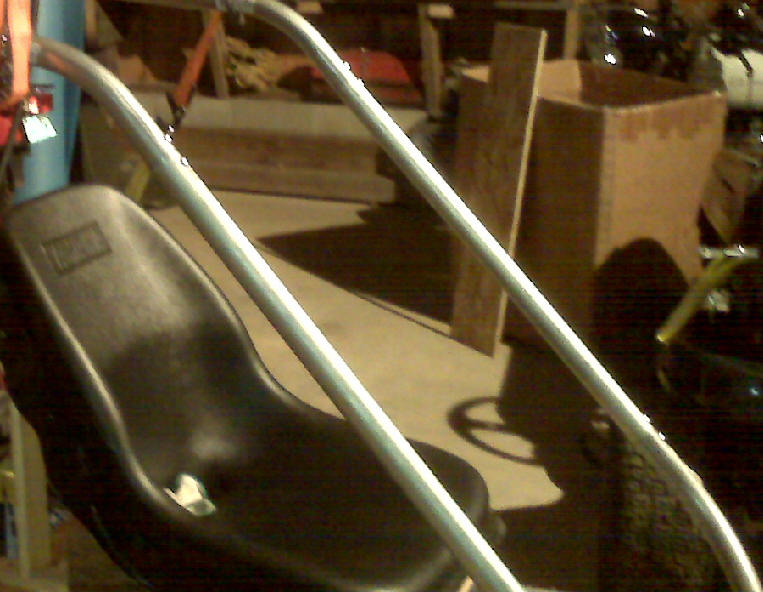
Frame is constructed from .090 wall 1 1/2 steel tubing. Bent and fitted
with machined inserts to join tubes. All machined components are aluminum. The
seat is from a Yamaha Rhino, one of those 2 place ATV's. I found the seat
cover/pad with foam backing at a Junk Store, it is pretty well made and real
comfortable, but I could not get the steel pan from Yamaha to mount the seat
pad/cover to. So I had to make a frame out of wood. It fits pretty
well, I sill need to get some material to cover the wood in the back.
The
Frame is constructed from .090 wall 1 1/2 steel tubing. Bent and fitted
with machined inserts to join tubes. All machined components are aluminum. The
seat is from a Yamaha Rhino, one of those 2 place ATV's. I found the seat
cover/pad with foam backing at a Junk Store, it is pretty well made and real
comfortable, but I could not get the steel pan from Yamaha to mount the seat
pad/cover to. So I had to make a frame out of wood. It fits pretty
well, I sill need to get some material to cover the wood in the back.
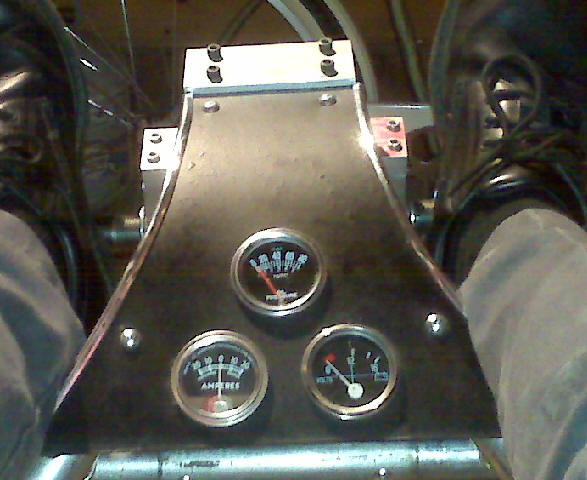
Since I used a 4 cycle engine I wanted to monitor oil pressure, with a electric start I also wanted to monitor voltage and amps. I am a gadget junkie, so it will have to have a GPS installed in the near future, that will require 'lectricity. Also since I want to fly the 1/2 hour before and after sunset I need lights and strobe, more 'lectricity will be needed. So I built a dash to hold gauges. I also wanted a compass and altimeter so that needed a mounting surface as well, so a dashboard was in order.
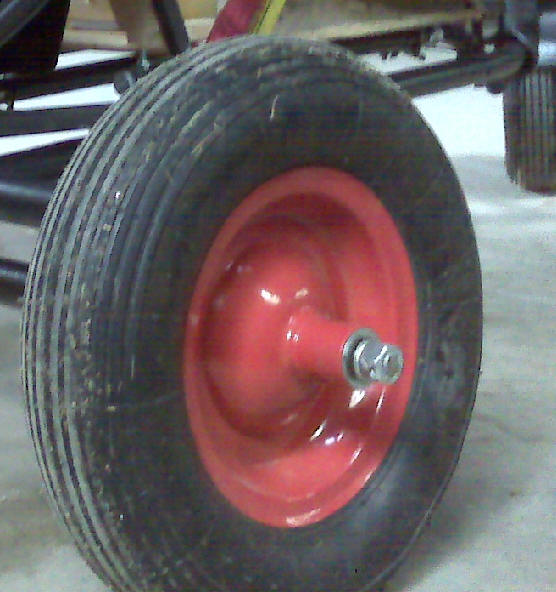
Wheels and tires came from Tractor Supply Company, $29.00 each. We did rework them some, by improving the bearings and adding in a sleeve between the bearings to support the inner races. It made the wheels a lot more stable and eliminated any wobble on the bearings.
The Bearing bore is 5/8 and the axle material is 5/8 threaded rod. The wheel nuts are drilled and pinned to the axle.
After I had completed the bearing work, I found the same wheel at the same import store I bought the seat from for $13.00 dollars each! Oh well.
The Wing
Not having a lot of experience flying yet, I wanted a
wing that was not going to be too fast. I wanted a beginners wing DHV 1-2
that is easy to launch and forgiving in flight. My first rig to fly was a
Fresh Breeze with Simonini on a Trike Buggy and a Sting Powerplay 140. It
was a good combo and the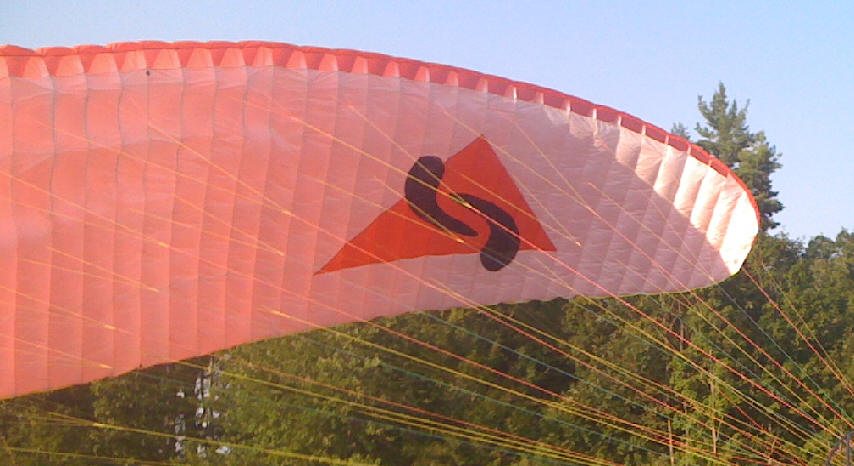 Powerplay is a good wing. Since I was familiar with it, I chose to stay with the
Sting. I knew I was going to be heavier than the Fresh Breeze/Trike Buggy
by a lot. So after consulting with Skyman we decided the 180 was rated for what
I needed. The 180 and the 250 have the same square footage and flight
characteristics, the only difference that gives it a higher rating is the line
diameter so I decided to go with the 250 to maximize the safety envelope.
With the Red Motor and Wheels I started a Red/Black theme going, my wife likes
that color combo and you know you gotta'a acknowledge her input you want to fly
one of these things! So the Red Sting Powerplay was purchased.
Powerplay is a good wing. Since I was familiar with it, I chose to stay with the
Sting. I knew I was going to be heavier than the Fresh Breeze/Trike Buggy
by a lot. So after consulting with Skyman we decided the 180 was rated for what
I needed. The 180 and the 250 have the same square footage and flight
characteristics, the only difference that gives it a higher rating is the line
diameter so I decided to go with the 250 to maximize the safety envelope.
With the Red Motor and Wheels I started a Red/Black theme going, my wife likes
that color combo and you know you gotta'a acknowledge her input you want to fly
one of these things! So the Red Sting Powerplay was purchased.
In closing
All in all I am real pleased with the build. The aircraft is a little heavier than I planned and I want to shave some weight off of it. This winter I am going to remove the double axle setup and build two separate landing gears, tripod shaped, one on each side. I have a few other changes in mind, but for now I just want to fly it while the weather is still decent.